
It’s not easy to leave WhatsApp in favor of another app. While the most popular safe alternatives are Signal and Telegram, they both require the user for a phone number that acts as a login to register. This central directory system is very practical to automatically find all of your contacts using the app as well, thus it acts as a trusted third party to validate each user’s identity, which in certain cases may lead to security issues. This method, utilizing a free QR code, ensures a hassle-free addition of contacts without the need for entering phone numbers or email addresses, enhancing user privacy and security.
Olvid, A French messaging app, which prides itself on being the most secure messaging app in the world, works on a different model. The app requires its users to cross-verify their identity, using a procedure that requires sending a code displayed on the screen of both users. The method is definitely more restrictive than the competition, but it allows for a higher level of security. In the following lines, you will discover everything you need to know to get started with Olvid.
1. Download Olvid
Start by downloading Olvid to your device. This secure messaging app allows you to send messages for free with your loved ones, but it requires a subscription that is billed for 5 € per month for making calls. More secure than WhatsApp and others, it does not use a central directory and requires manual verification of new contacts.
Download Olvid for Android (Free)
Download Olvid for iPhone (Free)
2. Create your account
Launch the app on your device, and on the first page that appears, tap New user. On the My ID page, fill in the information that you want to appear in your profile and click Record.
Then go through the application’s presentation pages, choose the one you prefer, especially in terms of notifications, then verify your registration with the button Welcome to Olvid.

3. Calling contacts
You should get to the app’s home page, devoid of messages, but especially from contacts. Olvid does not ask for your phone number or email address, nor does it run a central directory and thus cannot find your contacts who use it. So you have to add your contacts and validate them manually to be able to chat with them.
To add the first contact, tap the button + blue. Olvid displays your ID with a QR code. If potential contacts are by your side, they can follow the same process and accept your invitation by scanning the QR code displayed.
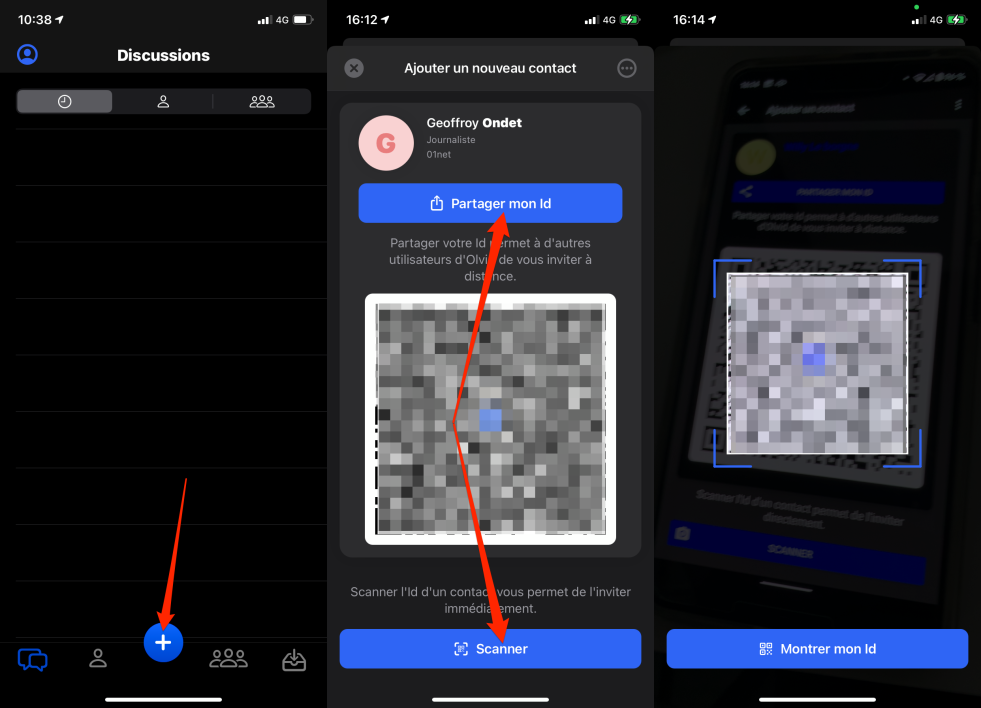
On the other hand, if the contacts are not by your side, you will have to use the function Share my identity From the application to send your invitation in another way. This could be a copy and paste link in any email app, for example. Then only the person you are inviting will have to click on the receiving link to join you on Olvid.
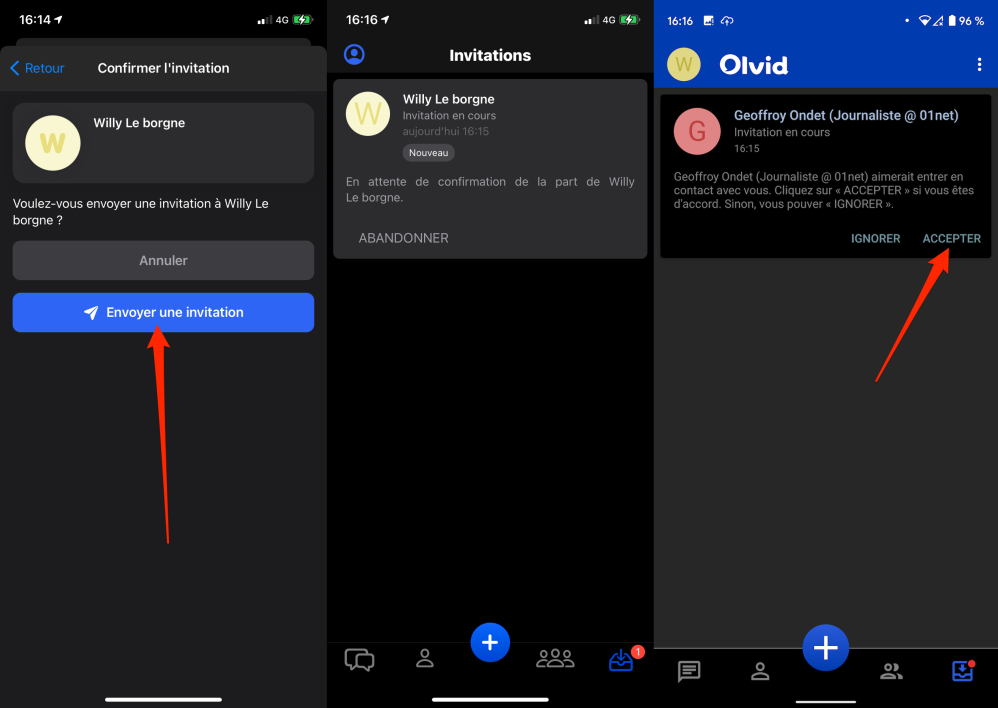
You will then be prompted Confirm the invitation. To do this, press send invitation.
Your contact should receive your invitation in their inbox on the Olvid app and press Acceptance To validate the connection.
4. Check your contacts
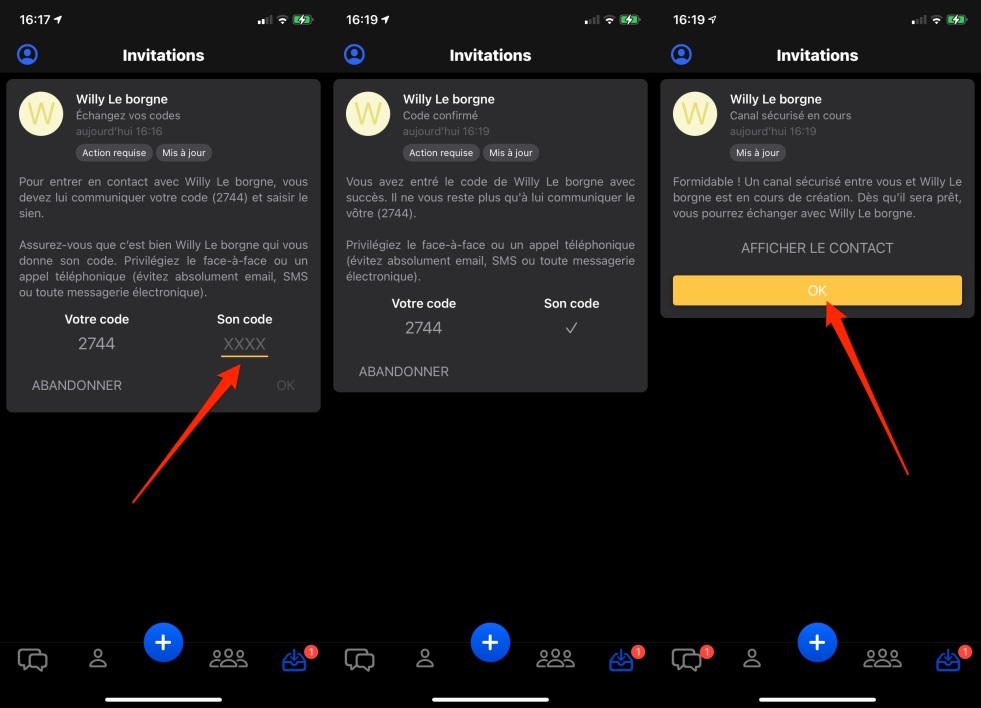
Once they accept this invitation, both users see the verification code displayed on their screen. Each of them must then communicate their code to the other for them to accept each other. Only after this mutual acceptance is Olvid’s secure chat channel created.
Click on you and your contact OK To finish the process.
5. Start a conversation
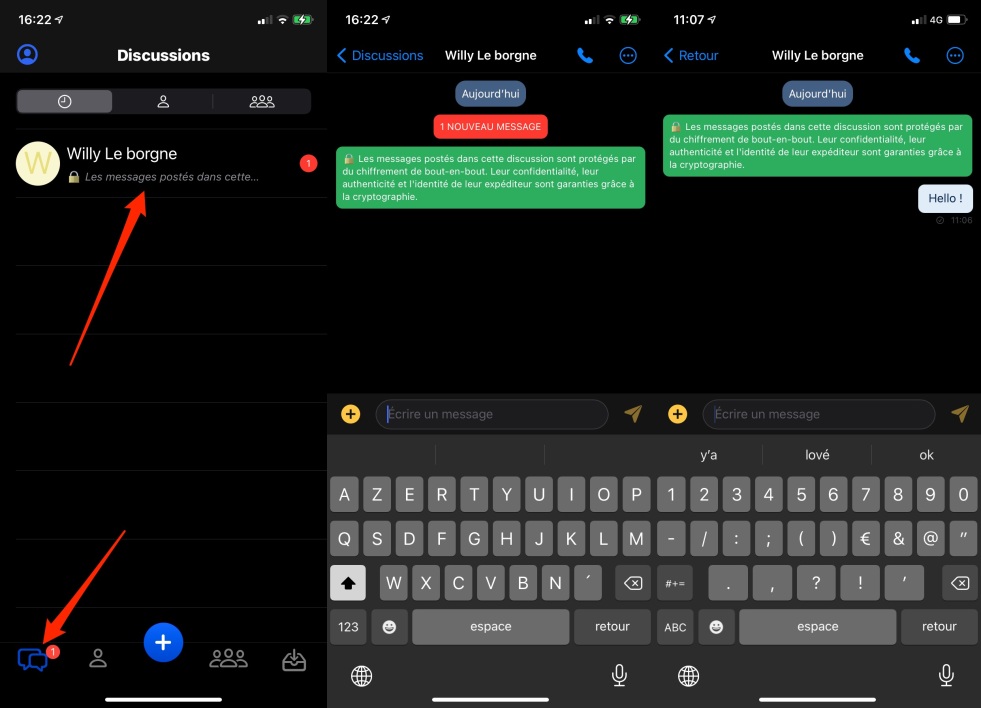
Now go to the Conversations tab to access the auto-generated discussion with the new contact. You can, of course, exchange text messages, but you can also share documents, photos, videos, and even quickly scan documents to send to your interlocutor.
6. Customize settings
Don’t forget to customize the general settings of the app. To do this, on iOS, tap on your avatar and then on the icon representing a cog wheel to enter the app settings.
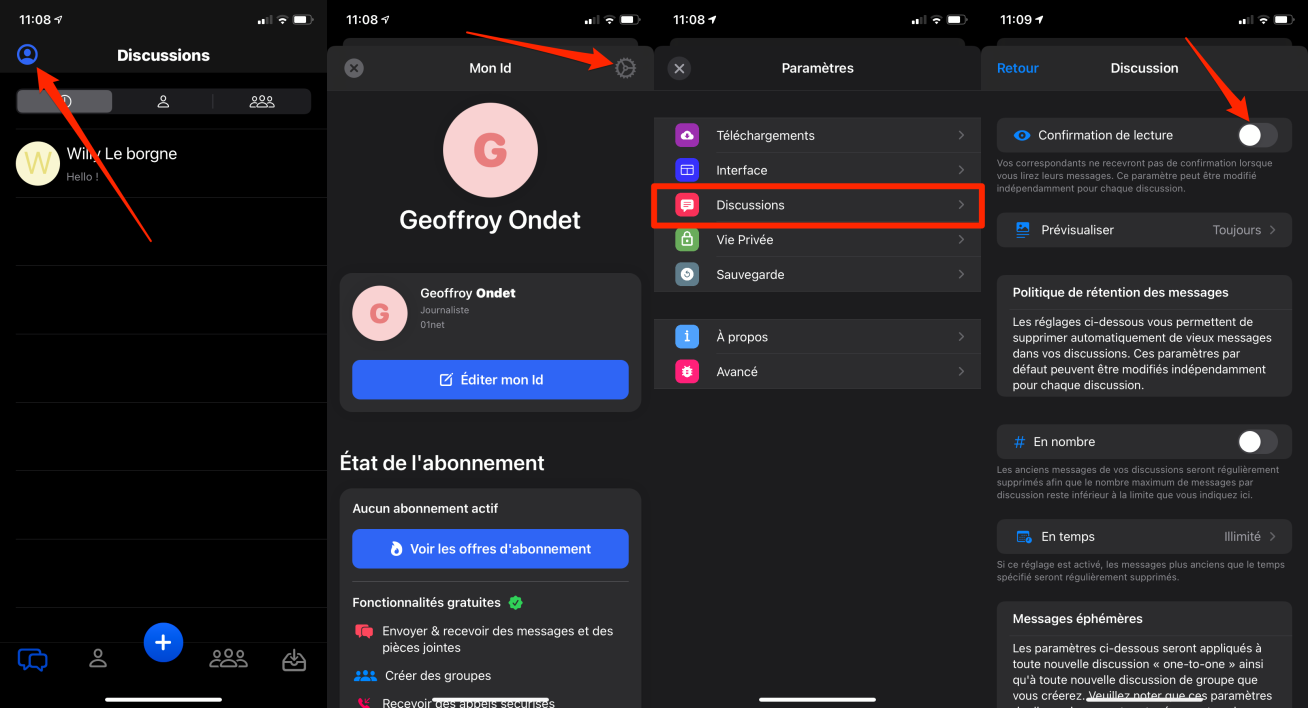
On Android, just click the options menu, represented by three small dots, then enter a file Settings.
Review the various parameters available, especially those related to discussions (iOS), Private life (Android) to activate / deactivate Read receipts According to your preference.
You can also define how long to keep messages, manage preferences in terms of visibility of temporary messages, etc. In the application settings, you can also create a backup key necessary to encrypt the backup you will be sending to the cloud.

Evan McKenzie is a contributor at Vaughantoday.ca, covering a wide range of topics including local news, politics, business, technology, sports, entertainment, and lifestyle. He focuses on clear, balanced reporting that helps readers stay informed about current events and issues that matter to their communities. His work aims to provide useful information, timely updates, and relevant stories presented in an accessible and reader-friendly way.