
Since October 5, Windows 11 has been officially available to all users who have a compatible device. Microsoft’s new operating system, which benefits from a real facelift, includes many new features. But in addition to the big news that the Redmond giant has officially introduced, Windows 11 has a lot of small changes that may not seem obvious at first glance.
To help you see more clearly, and to guide you in your first steps with Windows 11, discover and implement our eleven tips.
Also to discover the video:
1. Use the dark theme
When you first start up, Windows 11 usually uses an explicit theme by default. However, you can change this setting and choose a dark theme that is less aggressive on your eyes.
To do this, tap Menu to start, Login Settings and click Personalization in the side column.

Then enter the menu themes And select the dark theme you want.
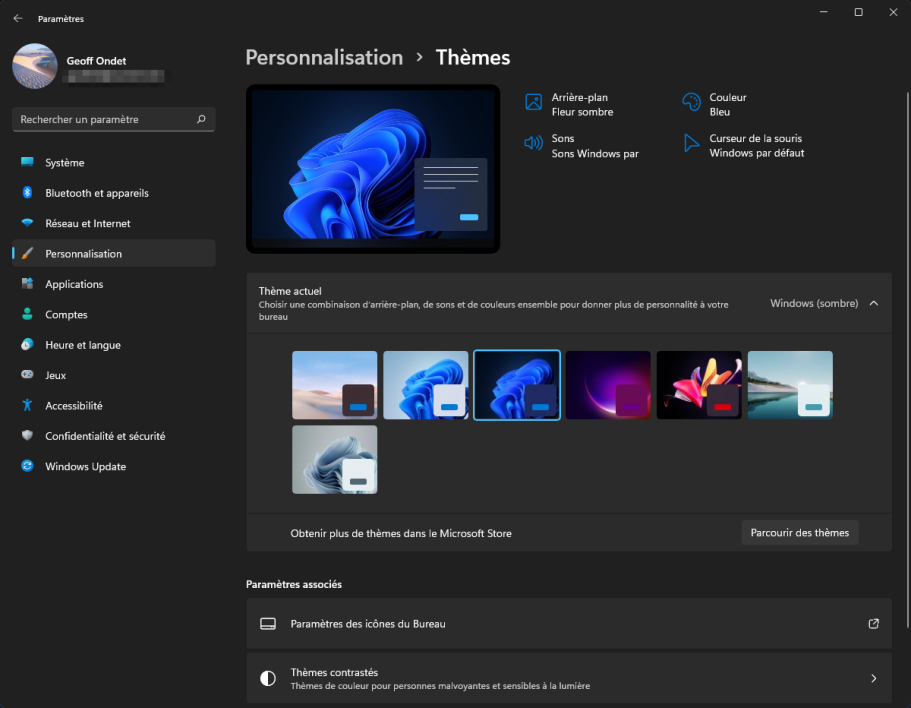
If you don’t like the themes originally suggested by Windows, you can download new themes from the Microsoft Store by clicking the button Browse threads.
2. Bring the Start menu back to the left
Windows 11 introduces a major interface change: start menu The taskbar is now centered by default. In addition to the aesthetic aspect, this choice was carefully considered by Microsoft, which wanted to improve and simplify its operating system so that its use would be as comfortable as possible regardless of the device on which it was installed.
If this change doesn’t work for you, you can tweak it all to display in the lower left, like in the brave Windows 10.
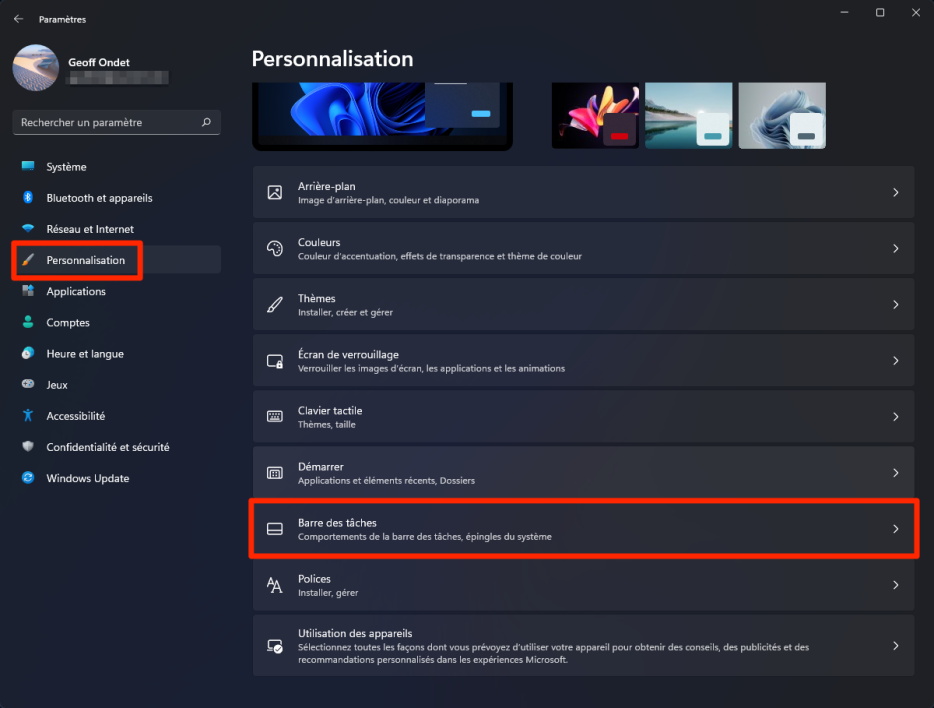
To do this, tap Menu to start, Login Settings, and go to the section Personalization.

Then enter the menu Taskbar Then, at the bottom of the window, click Taskbar behavior.
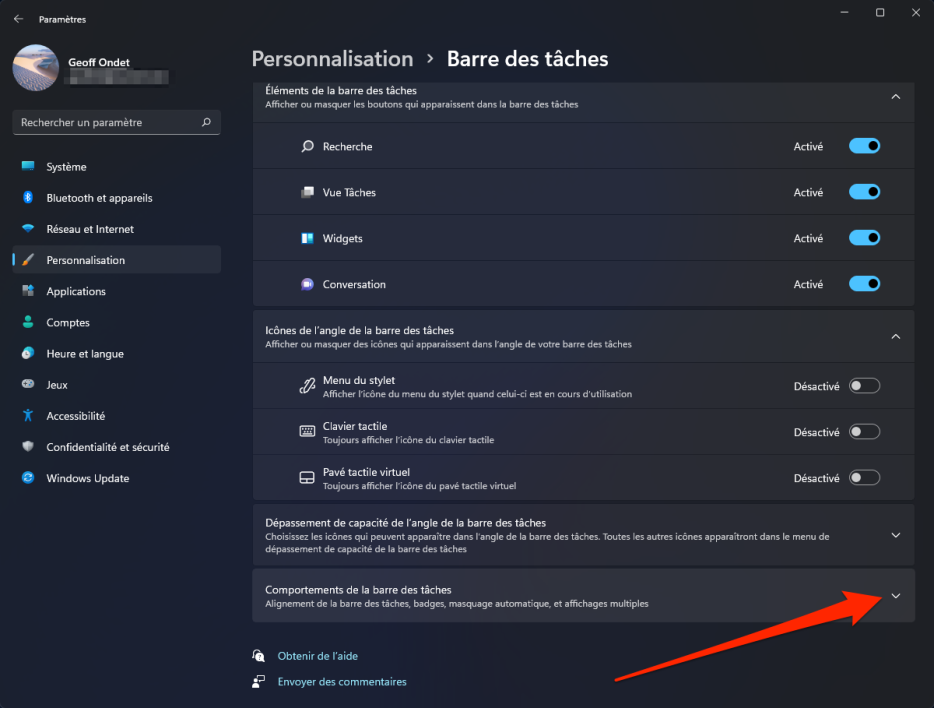
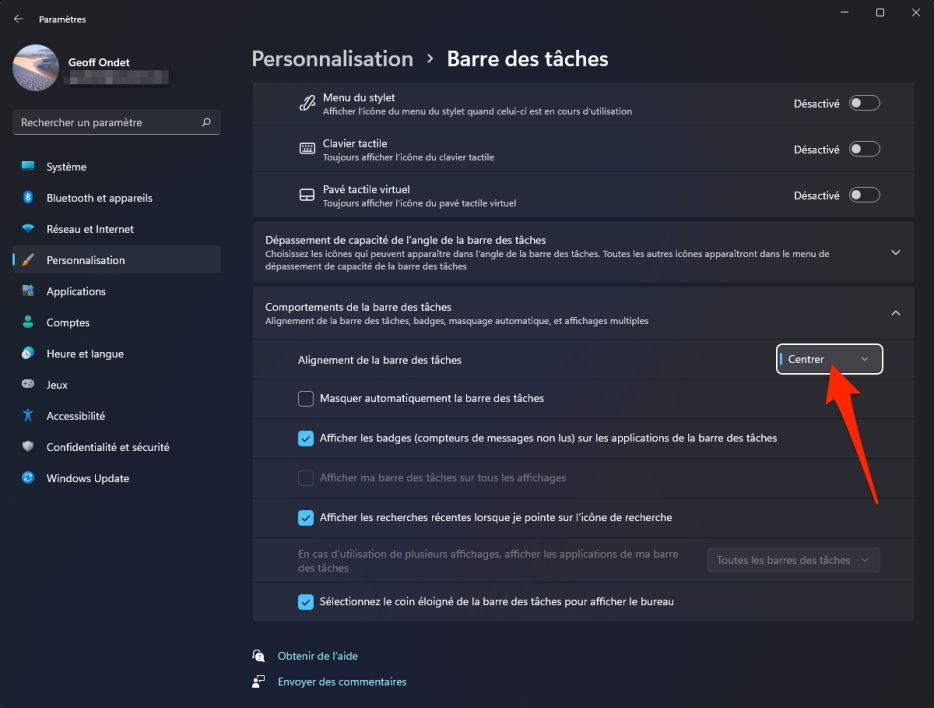
Select option integrity from the taskbar and click on the associated dropdown menu. Change the setting center via the left.
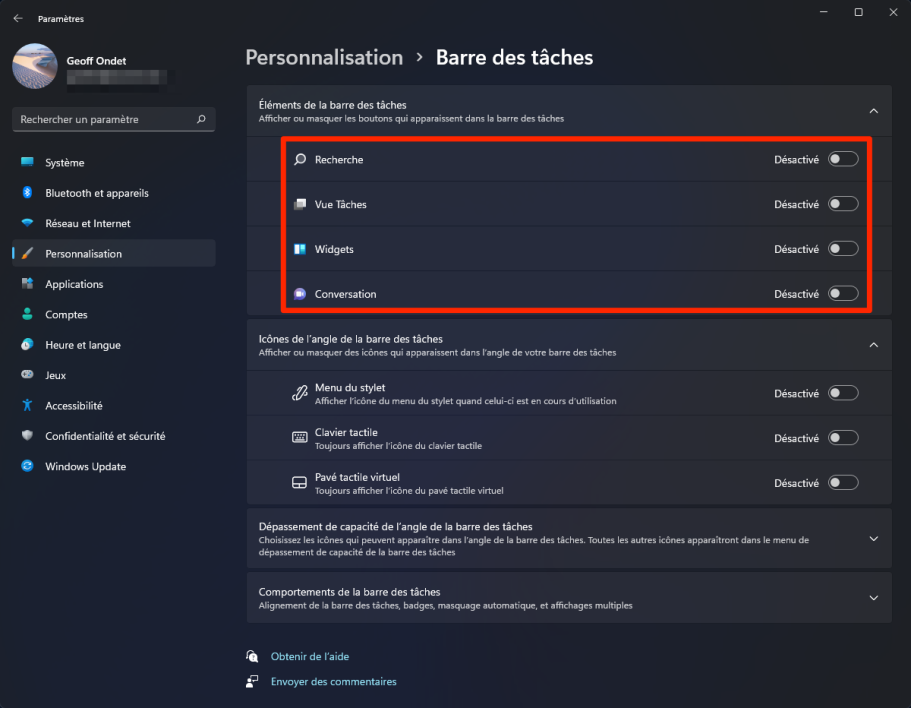
3. De-clutter the taskbar
In Windows 11, the taskbar inherits new functions, which you probably won’t use. So you don’t have to pretend you’re going to use widgets or call chats to open Microsoft Teams.
Fortunately, you can declutter the taskbar by disabling functions that take up unnecessary space. To do this, open the menu to start and meet in Settings Windows 11. Select Personalization in the left column and enter the menu Taskbar.
Then deselect the items you won’t use and that you no longer want to appear in the taskbar, like widgets where conversation.
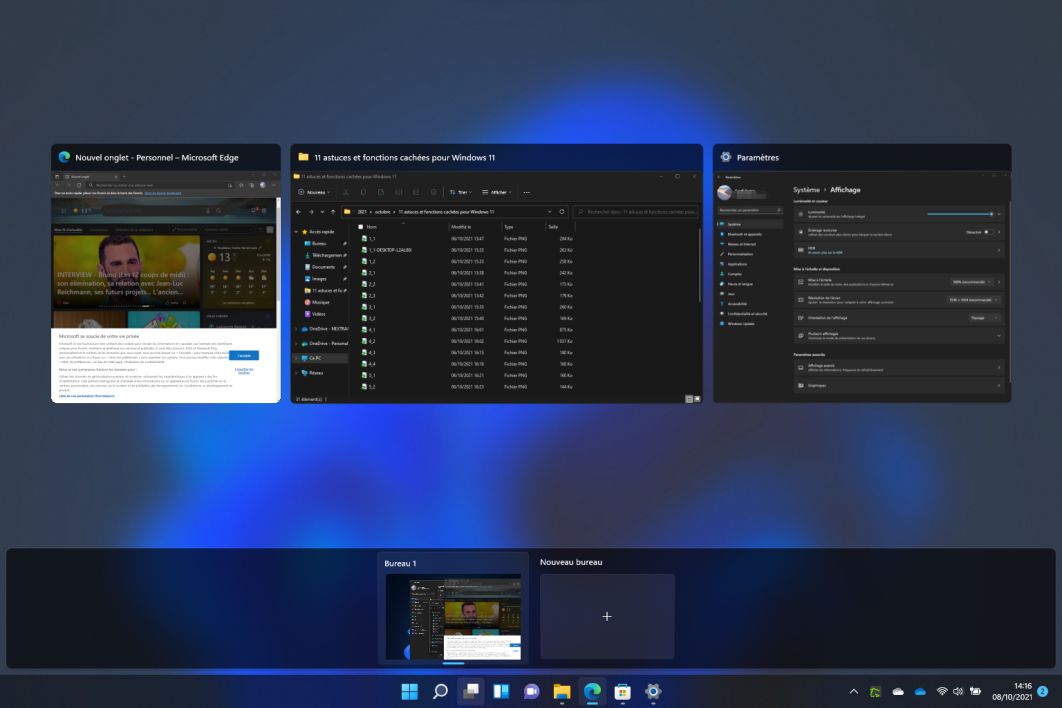
4. Use multitasking to arrange windows easily
Microsoft’s new operating system has a new function is windows management. known as Capture the layout In English, literally “instant page layout”, this function attached to Multitasking allows you to automatically reorganize the layout and size of open windows according to several pre-set styles.
To activate it, simply hover over the window’s maximize button with the mouse, and select one of the predefined styles shown.
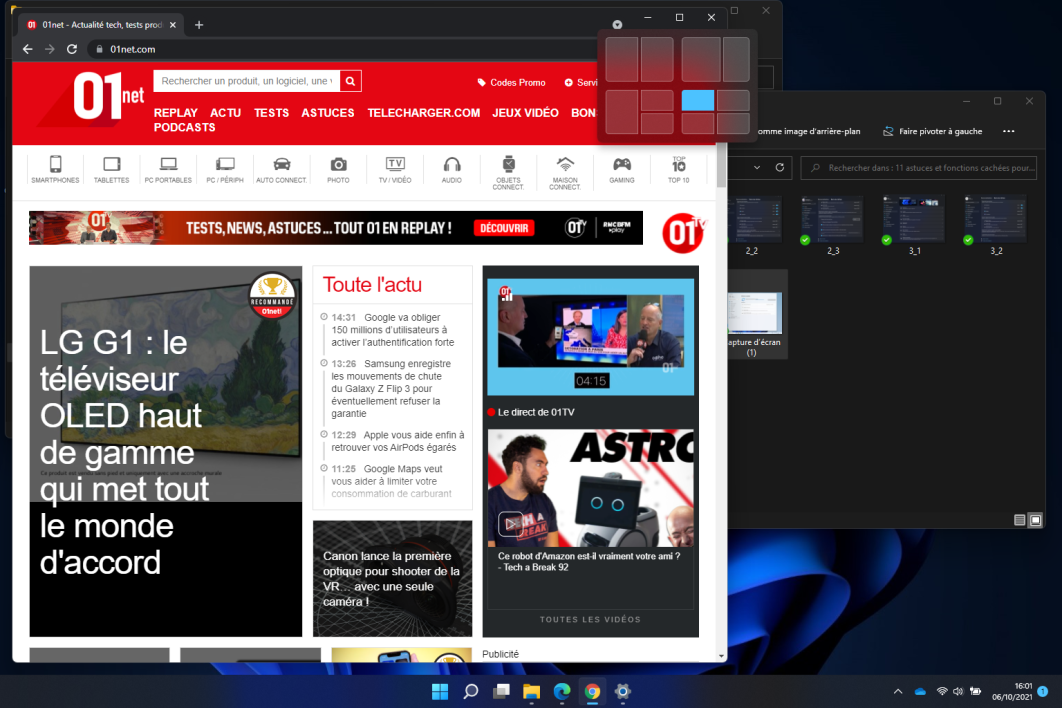
The active window is automatically positioned and resized in the chosen area. Then select for each of the remaining areas, the window you want to place there.
You can return windows to their original size by simply dragging them around the screen.
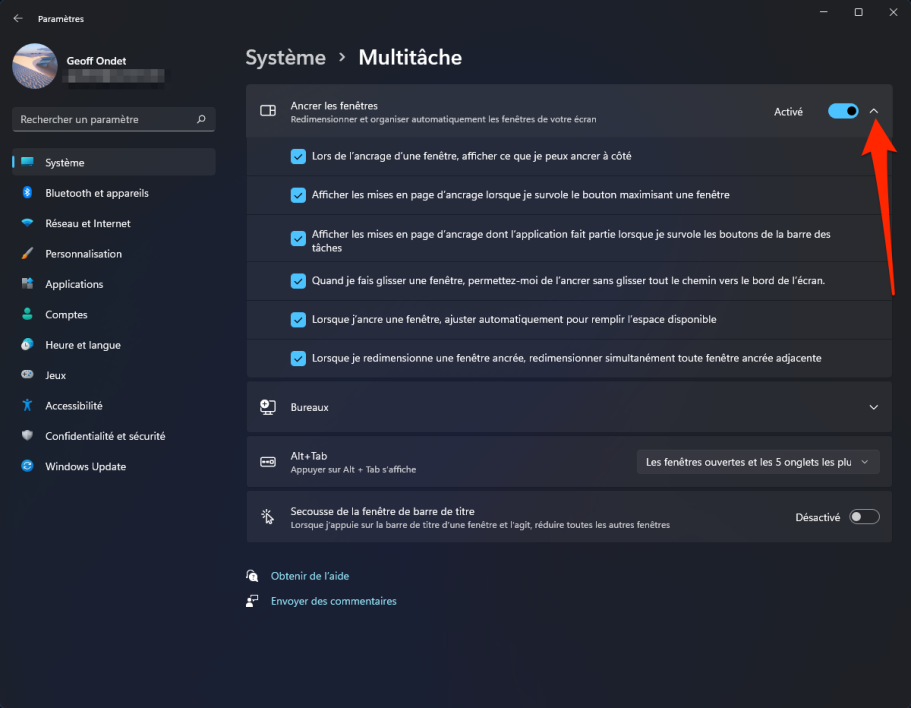
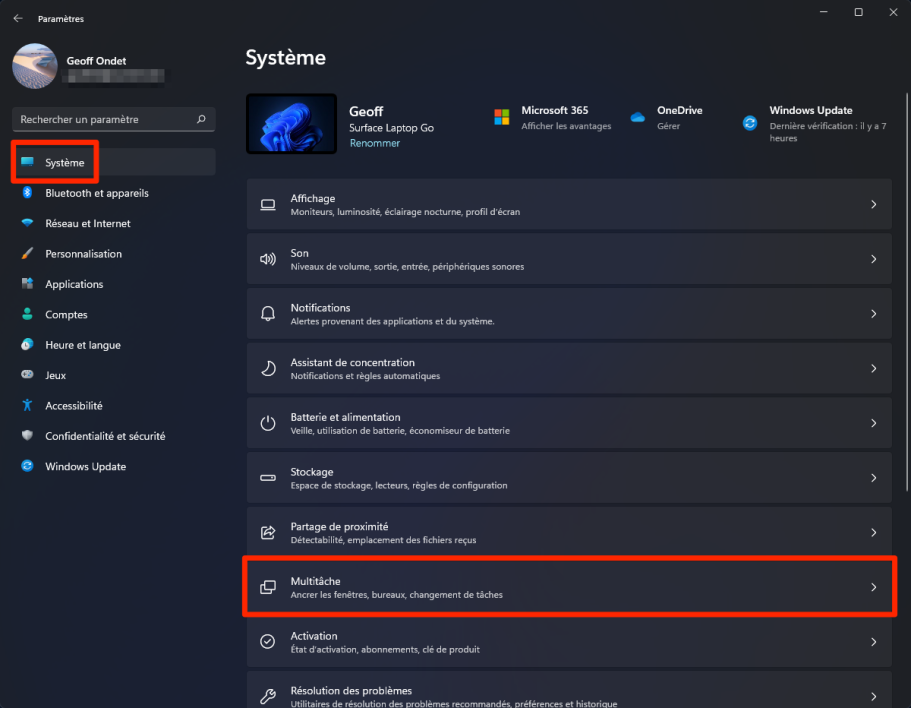
Note that this function, which can be deactivated, offers several customization options. To find them, open them Settings Windows 11, select System In the side column, enter the menu multitasking.

Then click Anchor windows Deploys all options related to docking open windows.
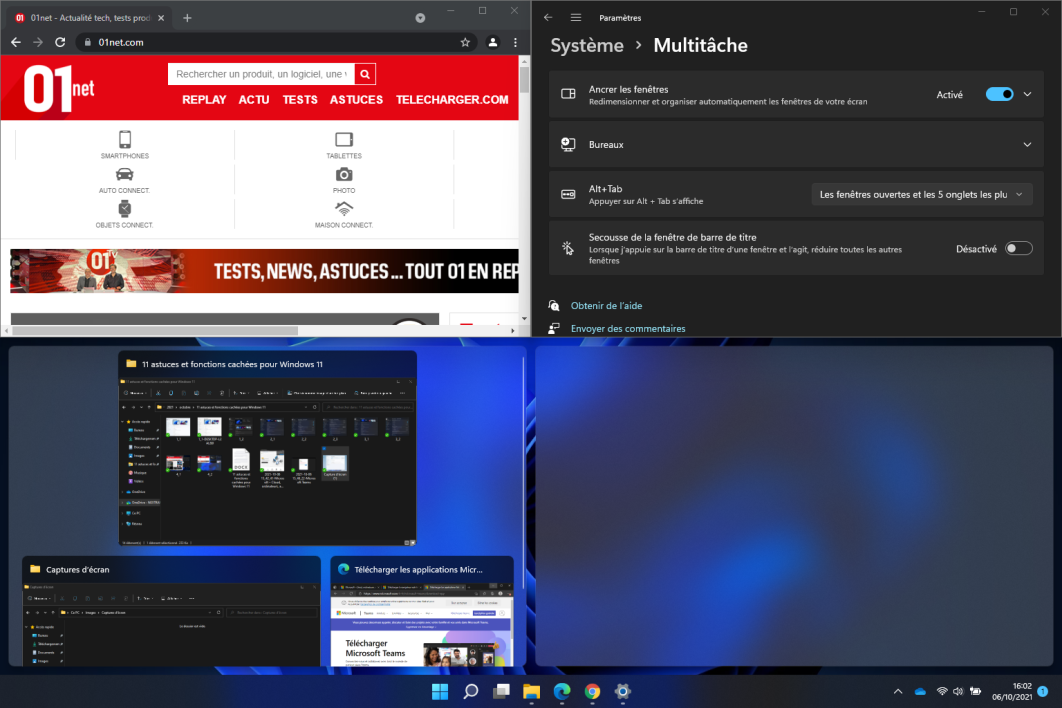
5. Master the behavior of the Alt + Tab shortcut
If you are using the key combination Alt + Tab To switch from one window to another and you just performed a clean install of Windows 11, activating it may not work the same way. Under Windows 10 already, Microsoft has decided to change the way it works. In addition to quickly switching from one application to another, Alt + Tab It integrates the tabs of the Edge web browser and can cycle between open tabs in the browser.
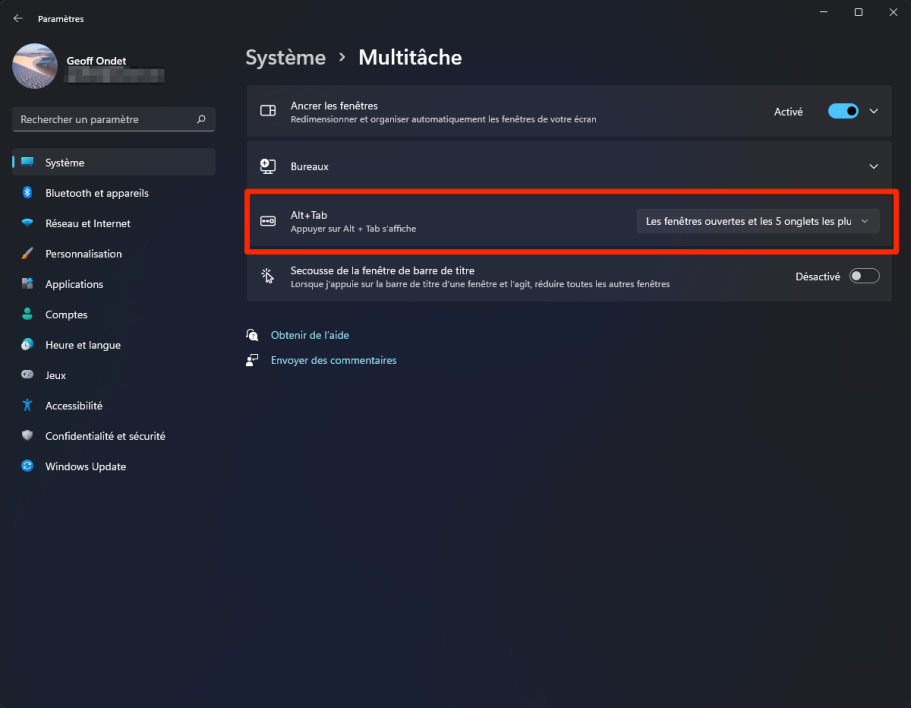
To go back to the initial process of this basic shortcut, open a file Settings Windows 11, choose System In the side column, enter the menu multitasking.
On-line Alt + Tab, open the dropdown menu, and choose the behavior you want to apply it to (obviously the most practical Open windows only).
6. Quickly minimize all other windows except the active window.
Again, the option was already there in Windows 10, but a boost shot never hurts. If you have multiple windows open, you can minimize them all at once, except for the active window, by tapping, clicking, and shaking the window’s title bar.
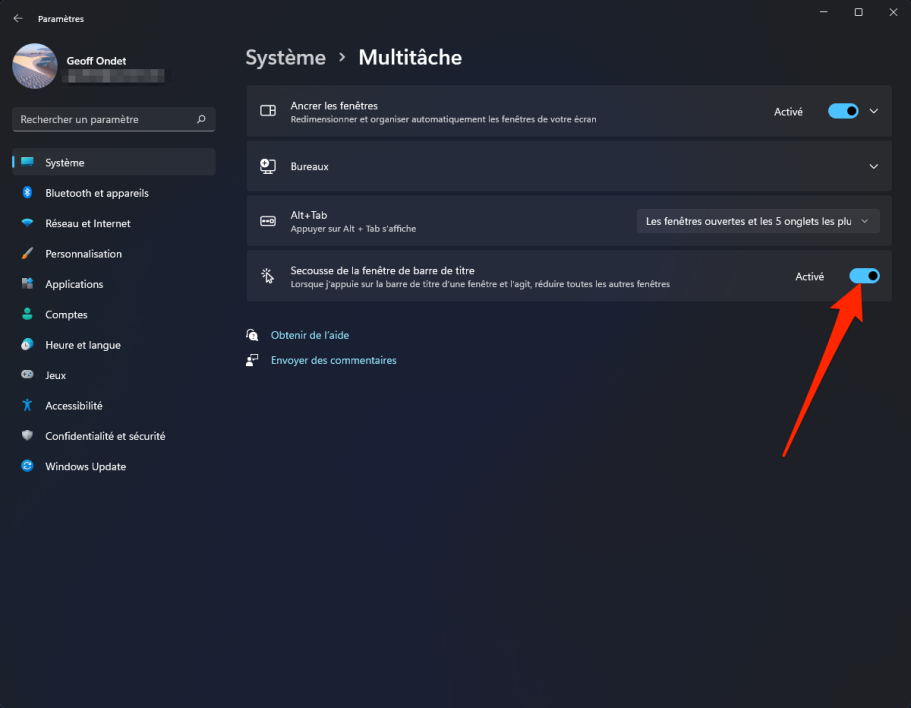
To activate this option, open a file Settings, enter the section System From the left column and activate the function Title bar window shake.
7. Take screenshots easily
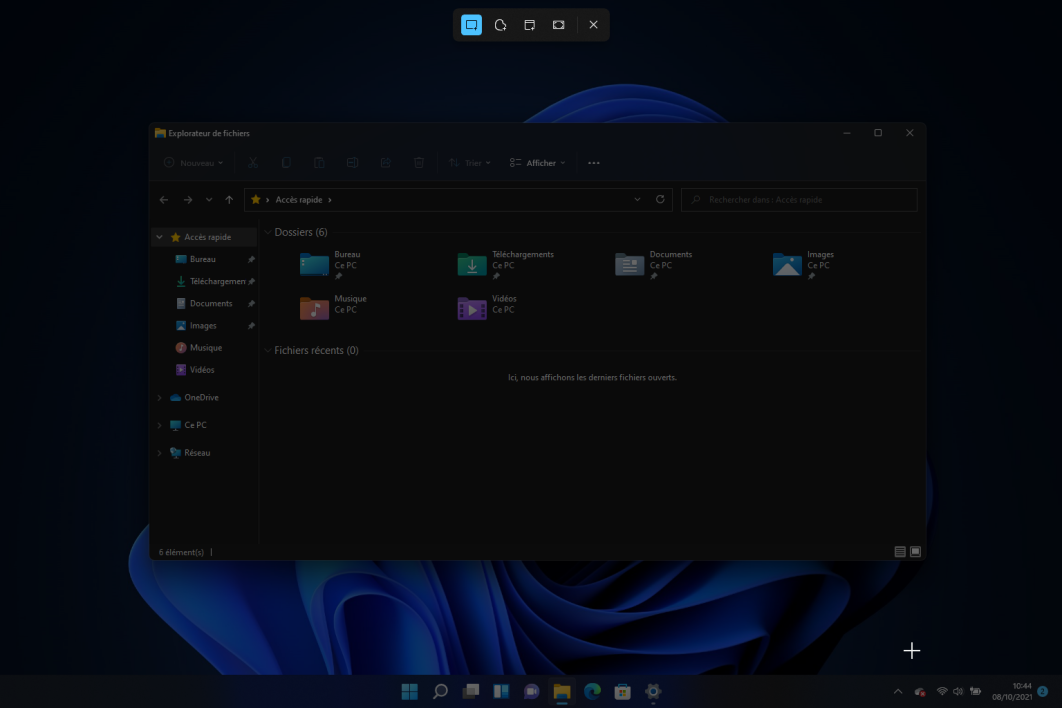
Windows 11 comes with a brand new screenshot tool. While it can be opened from the Start menu, you can quickly launch it with a keyboard shortcut: Windows + Mag + S.
You will then only have to select the type of capture to be performed and then select the region or window for recording. Screenshots are automatically saved to the Windows clipboard for use in another application.
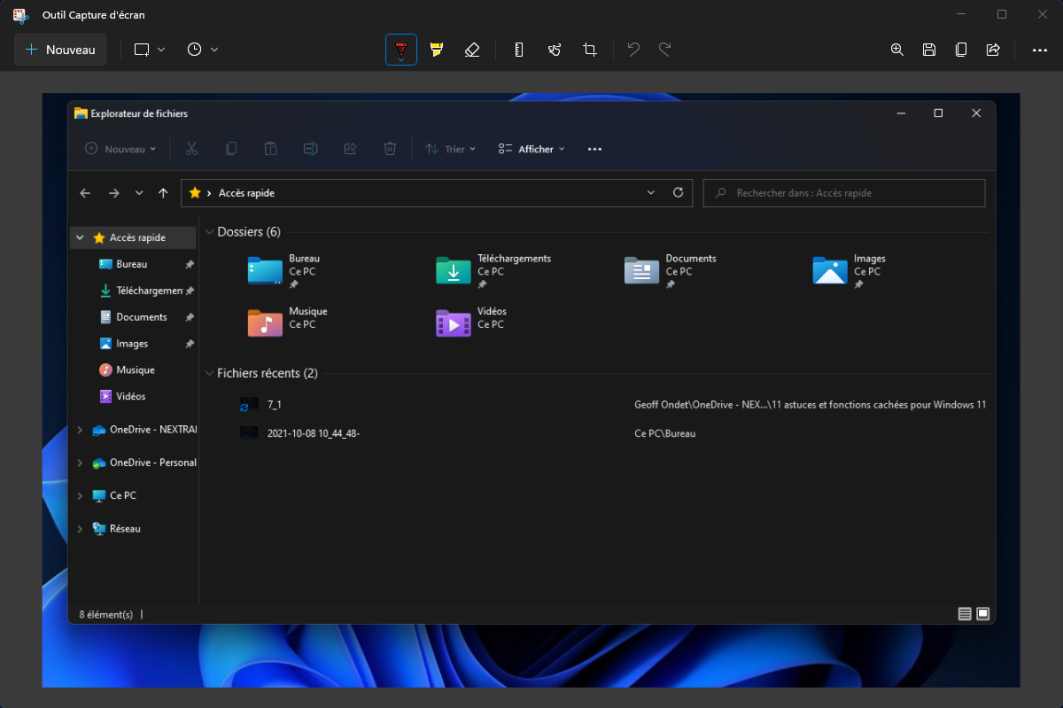
You can also click the popup displayed in the lower right before it disappears to open the screenshot in a filescreen capture tool In order to comment on them if necessary but above all save them in the directory of your choice in the form of an image.
And if with that abbreviation Win + Maj + S Too complex to remember, it is entirely possible to configure the key screen printed on the keyboard so that a file is activated screen capture tool.
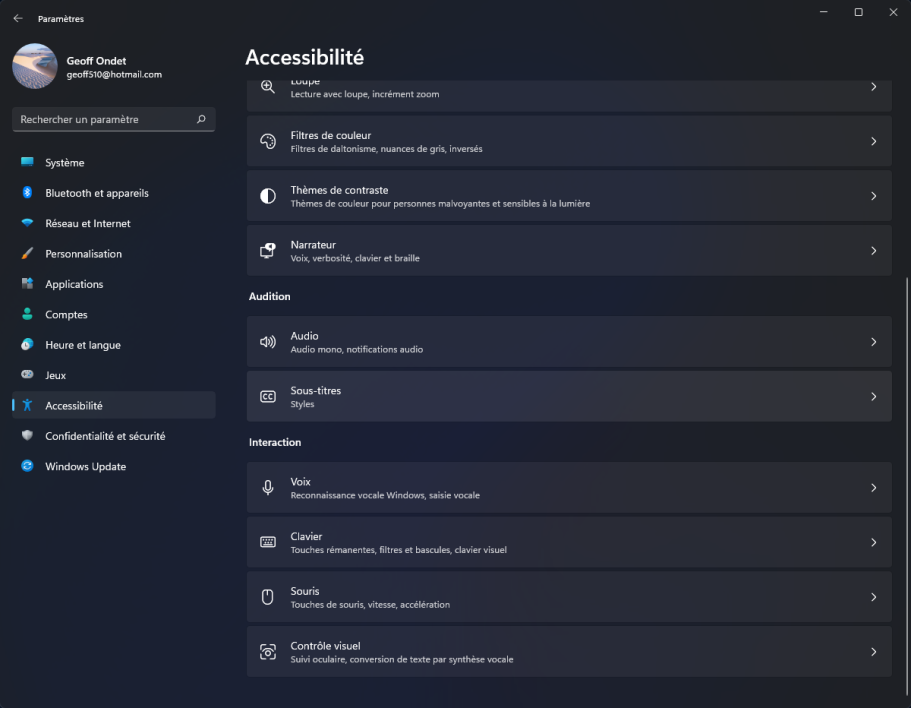
To do this, click on the Start menu, and open a file Settings Windows, and select Accessibility in the left column. Scroll through the options and enter the menu keyboard.
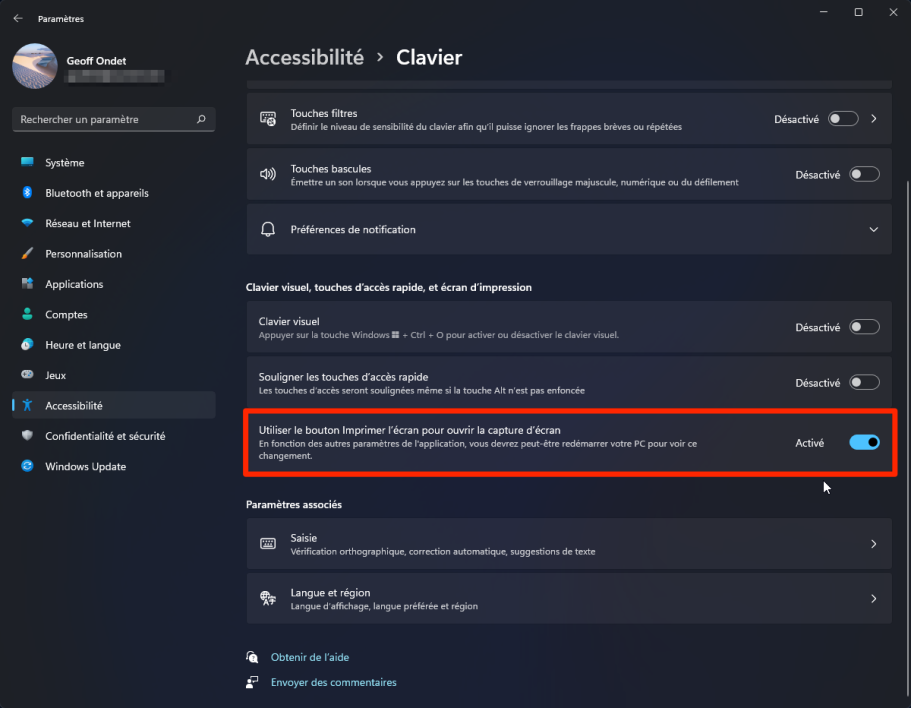
Finally activate the option Use the Print Screen button to open the screenshot. You will then only have to use the key screen printed to reachscreen capture tool.
8. Open multiple instances of Terminal in tabs
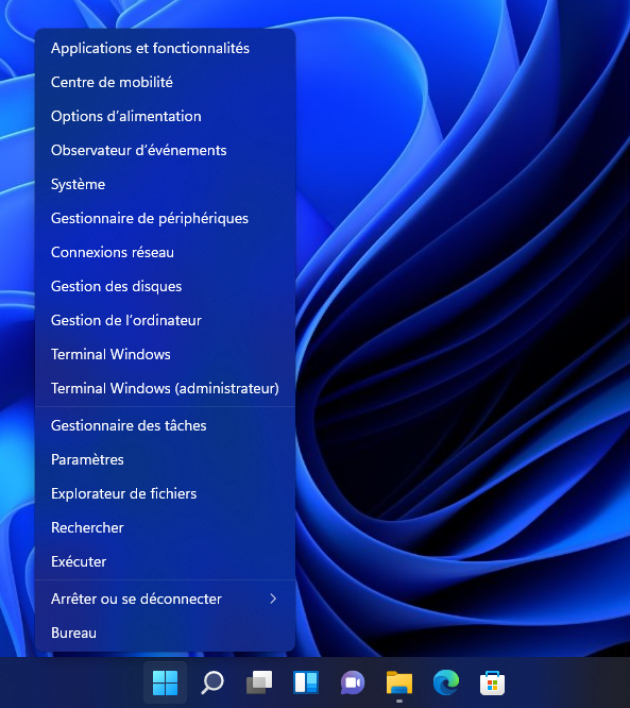
If you are an advanced Windows user, you can sometimes use the Command Prompt or other command line tools. Instead of opening multiple instances of different tools, Windows 11 bundles them all into a file Terminal windows.
To access it, right-click on the menu to start, and select Terminal windows.
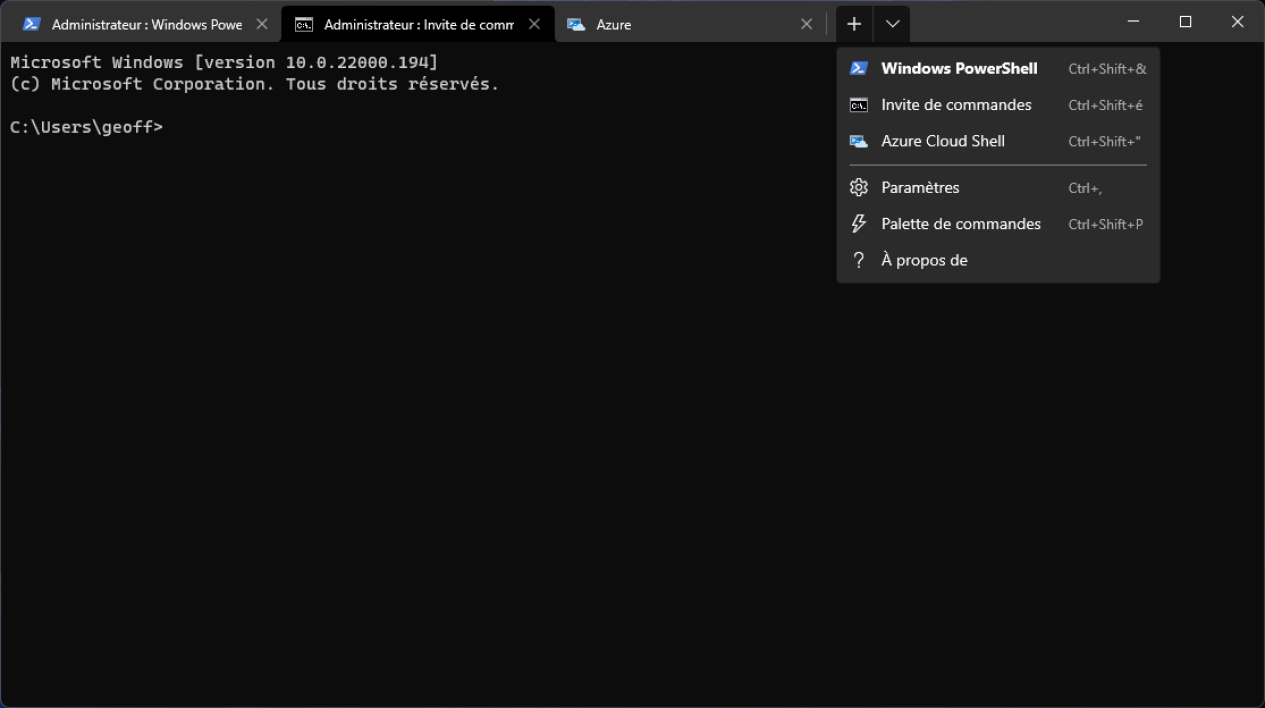
By default, Windows Terminal opens in a PowerShell tab. Click the dropdown menu in the status bar and select the command line tool you want to open in additional tabs.
9. Save the location of your windows on external displays
If you connect your laptop to one or more external monitors, it is undoubtedly because you are organizing your workspace by assigning, for example, certain windows or applications to each monitor. The only problem is that when you disconnect the screens from your device, in principle all installations have to be redone manually.
With Windows 11, Microsoft thought of you and incorporated an option that is very practical because it allows you to save the location of each window on connected external monitors.
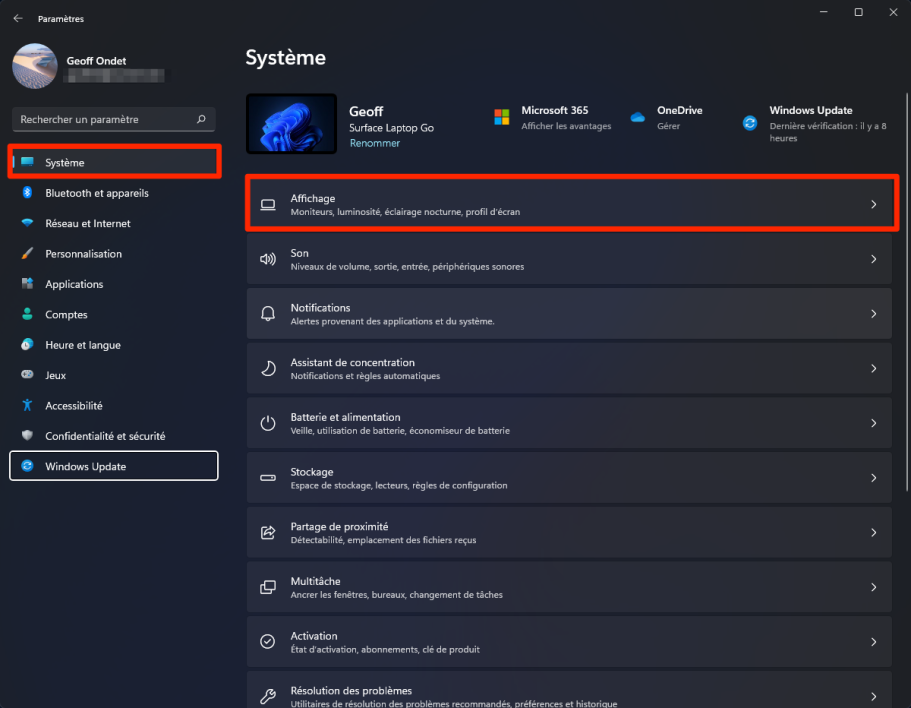
To find it, tap Menu to startopen them Settings Windows 11, then select System In the left column, enter the menu an offer.
Make sure that the option Save window positions according to screen connection It is activated for each of your screens.
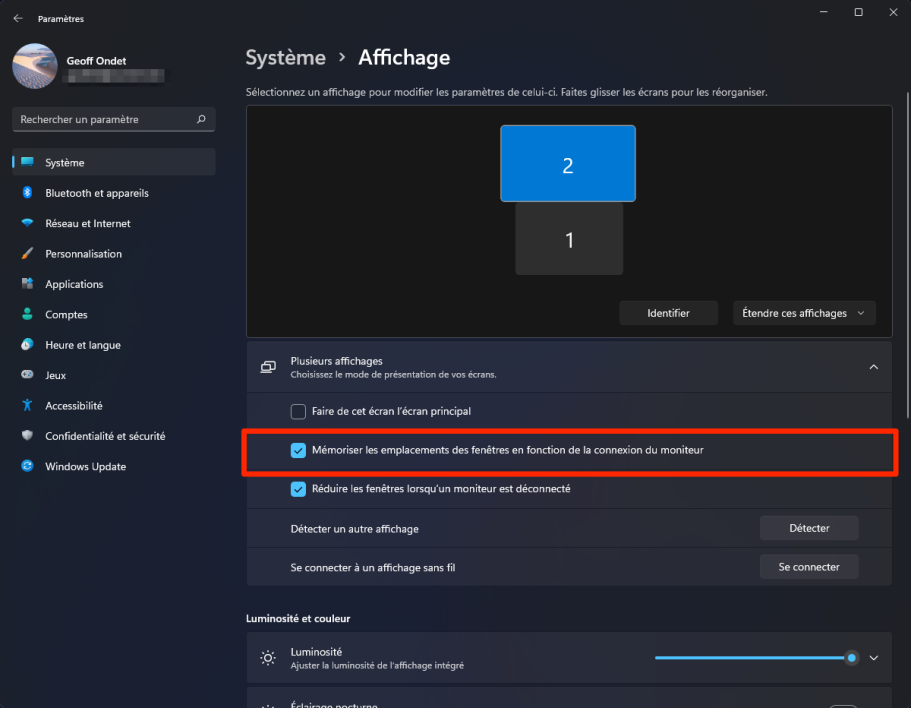
Now, when you disconnect and reconnect an external monitor to your computer, all open windows will return to the location you set them.
10. Separate your workspaces
Under Windows 10, Microsoft has already introduced a virtual desktop system. In Windows 11, virtual desktops have been completely redesigned. It can be accessed by clicking on the icon View tasks From the taskbar, the functionality allows you to separate different workspaces into several distinct desks, each with its own independent tasks.
When you click a fileView tasks, the function displays all open windows of the active desktop. You can then easily move a window from one virtual desktop to another.
You can quickly create a new desktop by clicking the button + new office When task view is open, directly by hovering over the taskbar button or using a keyboard shortcut Ctrl + Windows + Dr.
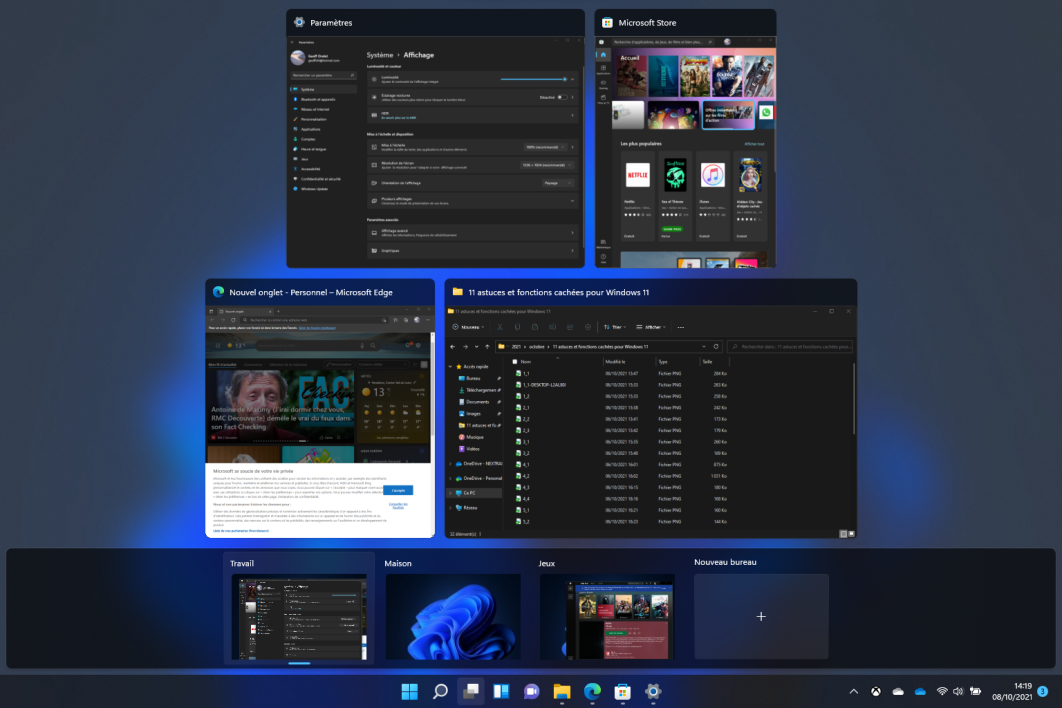
To quickly switch from one virtual desktop to another, use the keyboard shortcut Ctrl + Windows + left or right directional arrow.
11. Customize the directories pinned to the Start menu
There is no doubt that the Start menu as it was originally introduced requires you to pay attention, especially to install directories and applications that you use frequently.
You can also customize its default display by pinning certain features to the bottom of it, next to the power off button.
To do this, tap Menu to start, Login Settings, Choose Personalization In the side column and go to the section to start.
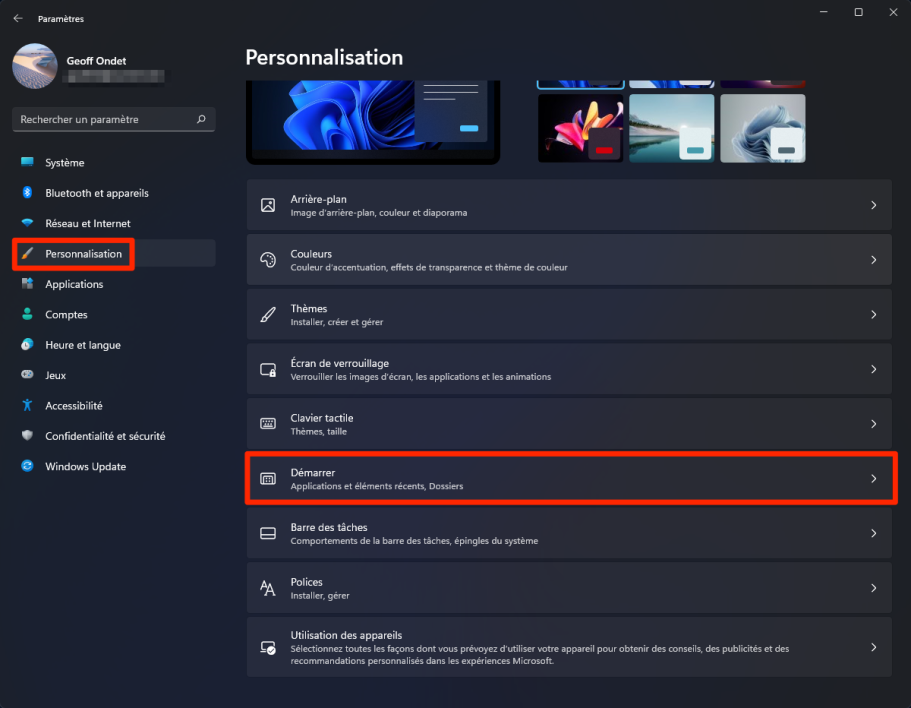
Then enter the menu files. Activate each of the items you want to appear in the Start menu.
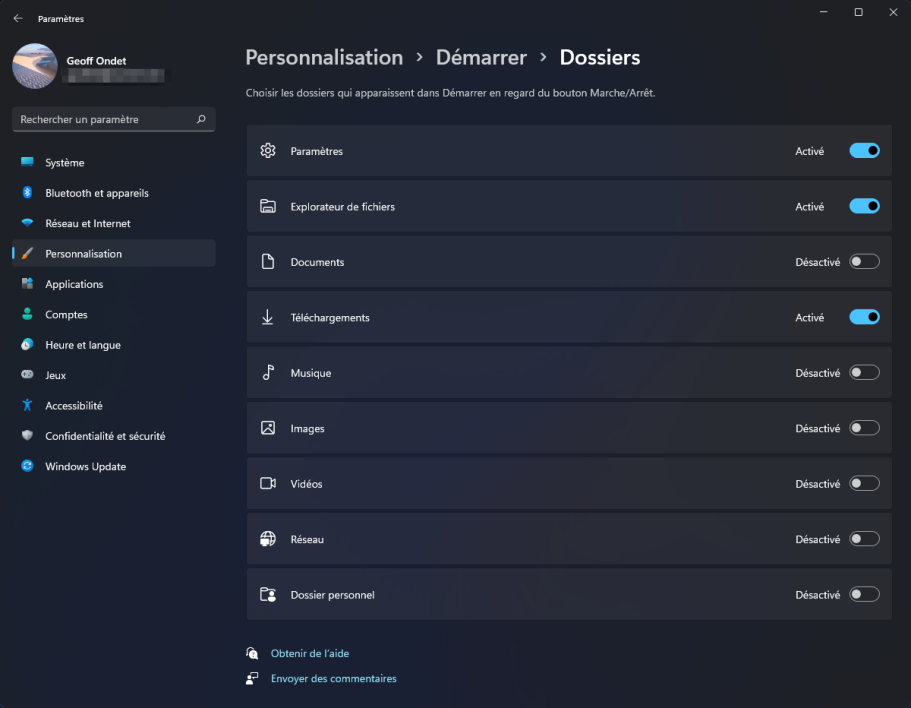
Now open the menu to start. New icons should appear next to the on/off button.
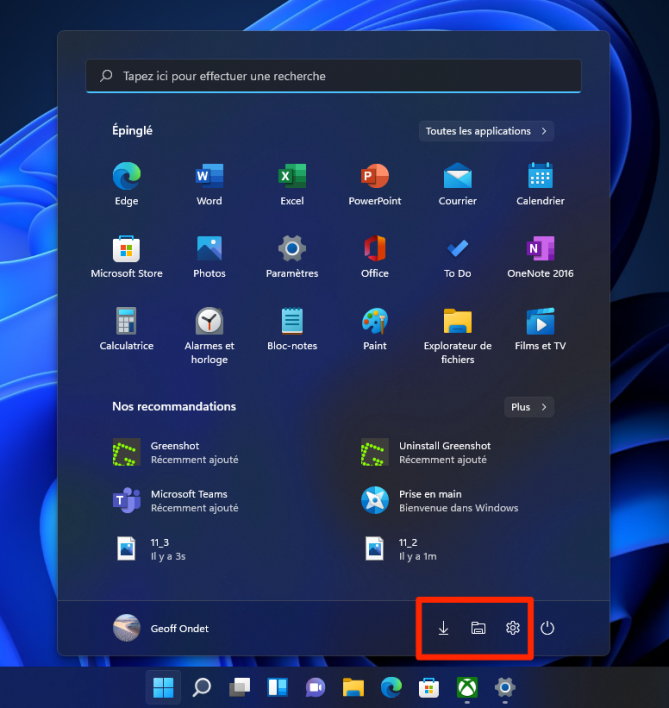
Unlike the items installed above, these icons cannot be easily uninstalled. It is already necessary to return to the operating system settings to remove them or add new ones. However, right-clicking on these icons will allow you to customize this menu, and directly access the respective parameters.

“Proud thinker. Tv fanatic. Communicator. Evil student. Food junkie. Passionate coffee geek. Award-winning alcohol advocate.”